Okay, people! It’s Week 11 and it’s our last “real” week of class. This week, we’re learning about Facebook’s language: React. It’s also the week we start our final capstone project, Project 4. But first, React.
Day 1: Intro to React
React was first used by Facebook in 2011 and Instagram in 2012. It’s a library used to craft modern day UI and create views for the front-end in the web client and native applications.
Learning Objectives of React:
- Explain what ReactJS is and where it fits in our applications’ stack.
- Explain the component model of web development.
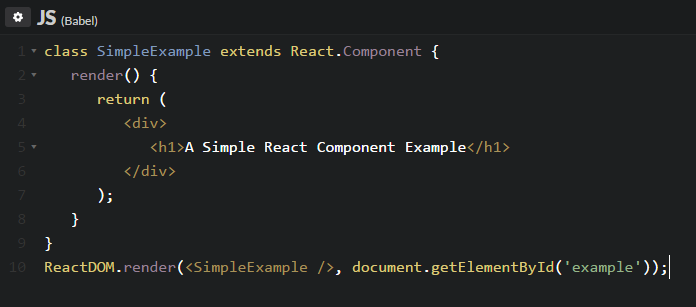
- Create and render React components in the browser.
- Pass in data to a React component via props.
- Nest React components.
- Modify the state of a React component through events.
So, we start up our in-class application by running a couple of commands:
$ npm i -g create-react-app
$ create-react-app blog-app
$ cd blog-app
$ npm run start
Running $ npm run start, lets you view the React app at http://localhost:3000
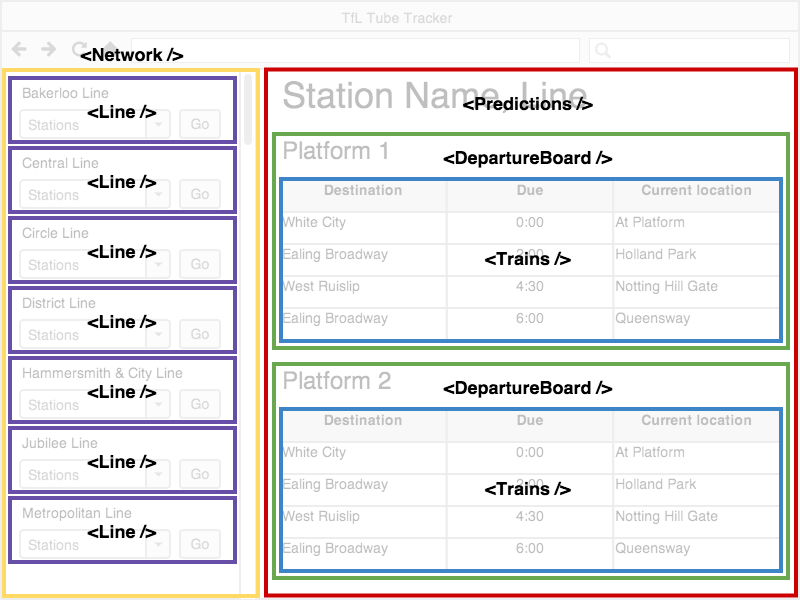
Another big component of React is the… Components. We took a look at different websites in class and broke down each site as a component. For example, that would look something like this:
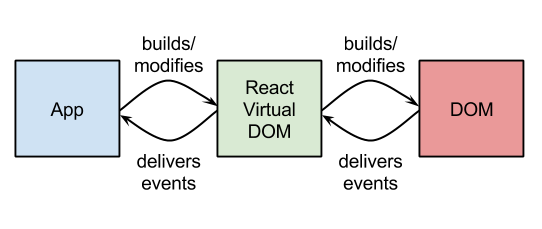
Another big component of React is it’s Virtual DOM. The Virtual DOM is a Javascript representation of the actual DOM.
- Because of that, React can keep track of changes in the actual DOM by comparing different instances of the Virtual DOM.
- React then isolates the changes between old and new instances of the Virtual DOM and then only updates the actual DOM with the necessary changes.
- By only making the “necessary changes,” as opposed to re-rendering an entire view altogether, we save up on processing power.
- This is not unlike Git, with which you compare the difference – or
diff– between two commits.
If you’re interested in learning more about the Virtual DOM, check this video out.
I won’t go too much more into React, since this isn’t a React tutorial ;)
Day 2: Outcomes and React Continued
Outcomes 2.5 Hours
Today in Outcomes we had a couple of industry leaders come into the classroom to chat about the dreaded technical interview! This was to help calm our nerves and prepare to nail our interviews.
We experienced first hand what it’s like to be in a technical interview setting and got tips on how to prepare. We practiced with each other and with industry leaders on general technical questions, what to do or say when you don’t know the answer and examples of interview scenarios. It was a great lesson and helped curve my expectations of what to expect during an interview. I definitely have some studying to do.
React: Practice, Paradigms, and Principles: 2.5 Hours

Learning Objectives
- Differentiate between Object-Oriented Programming and Functional Programming paradigms
- Explain how React incorporates principles of Functional Programming
- Identify state in a React app
- Define the role of Container components and when to use them
- Use jQuery to make AJAX calls in a React app
- Explain the ways to add styles to a React app
In today’s class we practiced building a React app that’s more complex than the intro’s simple blog example. When building an app like this, it’s important to keep certain development practices and paradigms in mind so that we can write maintainable code.
F.I.R.S.T. Components
A React component is built to expect an input and render a UI with it. More importantly, a (well-structured) component only receives data specific to its purpose.
While this doesn’t sound too groundbreaking, it is very different from the OOP principles we’ve gotten used to. This is because React follows a more functional approach to programming. For React components under this approach, the same input will always produce the same output.
There’s a lot of different ways to build an app, but for React, we talked about what a component should be: F.I.R.S.T.
Focused
Components should do one thing and do it well. One thing that’s hard to adjust to in React coming from an OOP background is packing too much information into a component.
Independent
Components should increase cohesion and reduce coupling. Behavior in one component should not impact the behavior of another. In other words, components should not rely on one another.
Reusable
Components should be written in a way that reduces the duplication of code.
Small
Ideally, components should be short and condensed.
Testable
Because the same input will always produce the same output, components are easily unit testable.
React’s State
So, why did we learn these principles? Because in React, it’s very to lose control of our application’s state. When I say “state”, I mean the properties of a component that change as the application runs.
Like for example, beginning a new game of Pokemon, what is the state of a new game? Well, you have 0 Pokemon and you’re still in Pallet Town. What is the state of Pokemon when you win the game? You have 8 badges and you’ve defeated the Elite Four. So, what’s the common theme here, when changes a state? An Event!
In Class Lab
To learn more about React, we built a movie browser application, allowing users to enter a search term, and view results of movies via the OMDB API.
If we got stuck, our instructors were around to help. At the end of the class, we were given the solution branch to check alternative ways on how to build this app.
Day 3: All Day React Lab
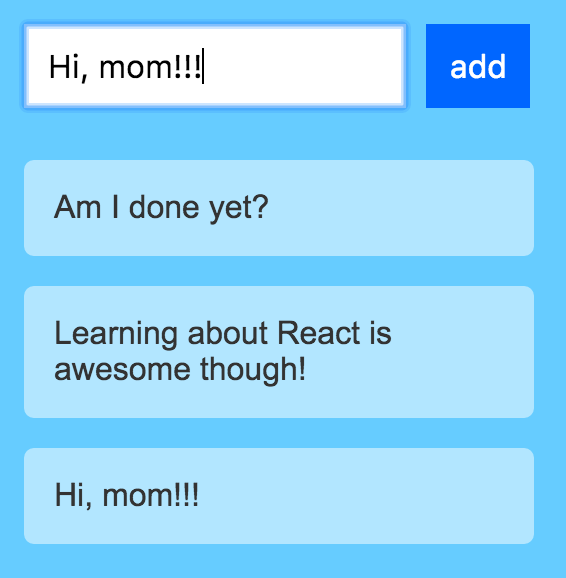
Today’s objective is to apply the fundamentals of what we learned so far by building a Todo app in React.
Why build a todo app?
Because it is the prototypical CRUD app that will test your web development skills with a different technology in a familiar domain.
I had a lot of trouble with this lab, but it definitely helped me understand all the things I needed to study up on. Ultimately, I used this very helpful Todo tutorial that helped walked through some concepts and techniques I was having trouble with.
Day 4 && 5: Project 4 Intro
THIS IS IT. We’ve come a long way, and it’s time to show it. Project 4 should be the most advanced project to date.
We get to call the shots and invent our own idea, choosing a framework & tools that are appropriate for whatever we want to build. Pulling from everything we’ve learned so far, and try to tackle something that will push us a little outside of our comfort zone.
We had to sure to review our project proposal with one of our instructors just to make sure it’s something we can accomplish in the limited time that we have.
Technical Suggestions
The app must:
- Be a complete product, which most likely means multiple relationships and CRUD functionality for at least a couple models
- Implement thoughtful user stories that are significant enough to help you know which features to build and which to scrap
- Be deployed online so it’s publicly accessible
So I spent a good chuck of time deciding on a project idea, writing out pseudocode, creating ERDs and researched various APIs to pick the most suited technology for my project.
Stay tuned to hear about my project idea. Head’s up - Next week is a short week - it’s Thanksgiving!
Until next time!