Last week was Project 2 week. We’re half way there, with only two more projects to go. Week 8 is the week I really started to feel the burn… there’s a lot of new technologies thrown at us and my brain is exploding with taking it all in.
This week, we talk APIs, AJAX, Building our own API, Firebase and the introduction to Project 3. Full warning: This is a beefy week so this post is pretty long. Let’s get started!
Day 1: UI Router && APIs && AJAX
For today, we dive deeper into technologies that I have zero prior experience on… exciting, but frightening all in one. Did it just get hot in here?
UI Router: 2.5 hours:
Learning Objectives on UI Router:
- Explain what dependency injection is and what problem it solves
- Explain the purpose of templates in Angular
- Create separate views and routes for each CRUD action
- Use the ui-view directive to load angular templates
- Use $stateProvider and $state to access query parameters and update the URL
- Define multiple controllers in a single module
So far, we’ve been using Angular to create some powerful front-end SPAs (Single Page Applications).

Single Page Applications are Web apps that load a single HTML page and dynamically update that page as the user interacts with the app. SPAs use AJAX and HTML5 to create fluid and responsive web apps, without constant page reloads.
The beautiful of this is it completely cuts out the reload (that quick white blank screen you see when you click on links) and renders a state instead of reloading. A state in Angular is basically a route: it’s an umbrella term for a URL, the view associated with it, and any controllers used in that view.
In class, we walk through injecting dependencies and configuring the ui.router for an Angular app, called Stoplight.
First, we inject the ui.router dependency in our Angular app:
angular.module("stoplightApp", [ui.router])
From here, we added routes to our config file, defined a state, using $stateProvider created views that are attached to our controller (one view for one controller) using templateUrl
And finally, displaying it on the browser using data-ui-view to render Angular inside HTML.
Whew. It’s lunch time and I’m definitely reviewing all of this during our two-hour lunch break.
APIs and AJAX: 2.5 hours:
Back into the beast of unknown territory! Horray! Honestly, I’m feeling the heat but staying optimistic.
Learning Objectives of APIs and AJAX:
- Explain the difference between synchronous and asynchronous program execution
- Explain why synchronous program execution is not conducive to the front-end.
- Use jQuery $.ajax() method to make asynchronous GET requests for data.
- Use jQuery’s ‘promise-like’ methods to handle AJAX responses asynchronously.
- Render new HTML content using data loaded from an Ajax request.
- Perform POST, PUT, and DELETE requests to an API to modify data.
Our first task in class was to open Google Maps and answer the question: what’s happening asynchronously? Spoiler alert: The answer is everything.
From here, we discussed APIs, Application Program Interfaces, which are commonly known as web data that can be accessed and used for raw data.
API data comes in two different formats: json (Javascript Object Notation) and XML (eXensive Markup Language). For this class (and hopefully for life) we focused on JSON.
JSON looks a little something like this:
{
  "users": [
    {"name": "Bob", "id": 23},
    {"name": "Tim", "id": 72}
  ]
}
and XML looks like this:
<users>
  <user id="23">
    <name><![CDATA[Bob]]></name>
  </user>
  <user id="72">
    <name><![CDATA[Tim]]></name>
  </user>
</users>
Yeah, my eyes definitely prefer JSON.
Next in class, we got to play with a couple of different APIs! First, we made GET requests to Giphy’s API and found some cool cat gifs.
Using $.ajax, a jQuery method:
We all requested an API key from Weather Underground API and used $.ajax (Asynchronous Javascript and XML) to make GET requests to bring in data.
Here’s an example of what I mean:
$("button").on("click", () => {
  // Make sure to add the API key to the URL!
  var url = "https://api.wunderground.com/api/your_key/geolookup/conditions/q/va/midlothian.json"
  $.ajax({
    url: url,
    type: "get",
    dataType: "json"
    // $.ajax takes an object as an argument with at least three key-value pairs...
    // (1) The URL endpoint for the JSON object.
    // (2) Type of HTTP request.
    // (3) Datatype. Usually JSON.
  }).done(() => {
    console.log("Ajax request success!")
  }).fail(() => {
    console.log("Ajax request fails!")
  }).always(() => {
    console.log("This always happens regardless of successful ajax request or not.")
  })
})
With APIs, you can do much more than GET requests… we can create POST, PUT, DELETE, etc requests as well. However, I don’t think Weather API would allow us to modify their data, which means, we’ll have to build our own API instead… And that’s exactly what we did next in class.
For the last hour of class, we updated our trusty Tunr app using AJAX and CRUD to create the ultimate Tunr Rails API app featuring every HTTP request!
The biggest takeaway from today’s session: APIs are freaking cool AND It is very important that developers do not push API keys to a public Github repo. There’s some pretty scary horror stories out there…
Day 2: Outcomes && Angular Resources
Outcomes: 2.5 Hours:
Today in Outcomes, we focused on building our online General Assembly Alumni Profile in class. Online Alumni Profiles are the best way for GA’s employment partners to reach students directly regarding new opportunities. This session was dedicated to building our Alumni Profile utilizing our Brand Statement, Resume and Job Search Strategy.
Feel free to check out my General Assembly Profile Shoot me and email. I love emails! And I really love emails with potential job opportunities inside of them.
Angular Resources: 2.5 Hours:
Another big class with so many new things to learn. This lesson focused on a couple of Angular’s Resources: Factories, Services and ngResource.
Learning Objectives of Angular Resources:
- Explain the purpose of Factories in Angular.
- Use ngResource to pull information from an API.
- Use $stateParams to access query parameters and update the URL.
- Create separate views and routes for each CRUD action.
In the last couple of classes, we used hard coded data to act as our “backend”. Those days are over and instead, we’ll be connecting to an external API using resources and providing an interface to models using factories.
We start by cloning down a repo with a Rails API. Our front-end in-class application will make AJAX calls to that API. First, we convert the hardcoded data to read from an external API using a Factory.
A Factory is an Angular Component that generates new instances of something.
For this in class assignment, we were told not code along. Btw, I’m REALLY bad at not coding along… It feels unnatural to sit and watch when there’s coding to be done!
We watched as our instructor walked through each step building a CRUD (create, read, update, delete) application. Between each step, we were given 10-15 mins to complete the CRUD step locally. Going back and forth between watching and doing, we completed creating RESTful routes and using a Factory to query our API.
Homework was assigned and I’m feeling overwhelmed on a Tuesday.
Day 3: APIs API && FireBase
I spent 4 extra hours at school yesterday due to wrapping my head around our homework assignment on Angular Resources, Factories, and AJAX calls. Feeling a bit tired today but excited because we’re building our own API and getting closer to Project 3!
APIs: 2.5 Hours:
So, we have used third-party APIs and we have used our instructor’s custom built API… now it’s time we learn how to create our OWN API from the ground up! This will serve up JSON and render HTML views.
Learning Objectives of APIs:
- Describe what an API is, and why we might use one.
- Describe the purpose and syntax of respond_to
- Make a Rails app that provides a JSON API.
We start off the class with an API Exploration. Taking about 10 mins, we searched some popular APIs and discussed our opinions on them.
Next, we make a couple of basic HTTP requests to an API, using Postman.
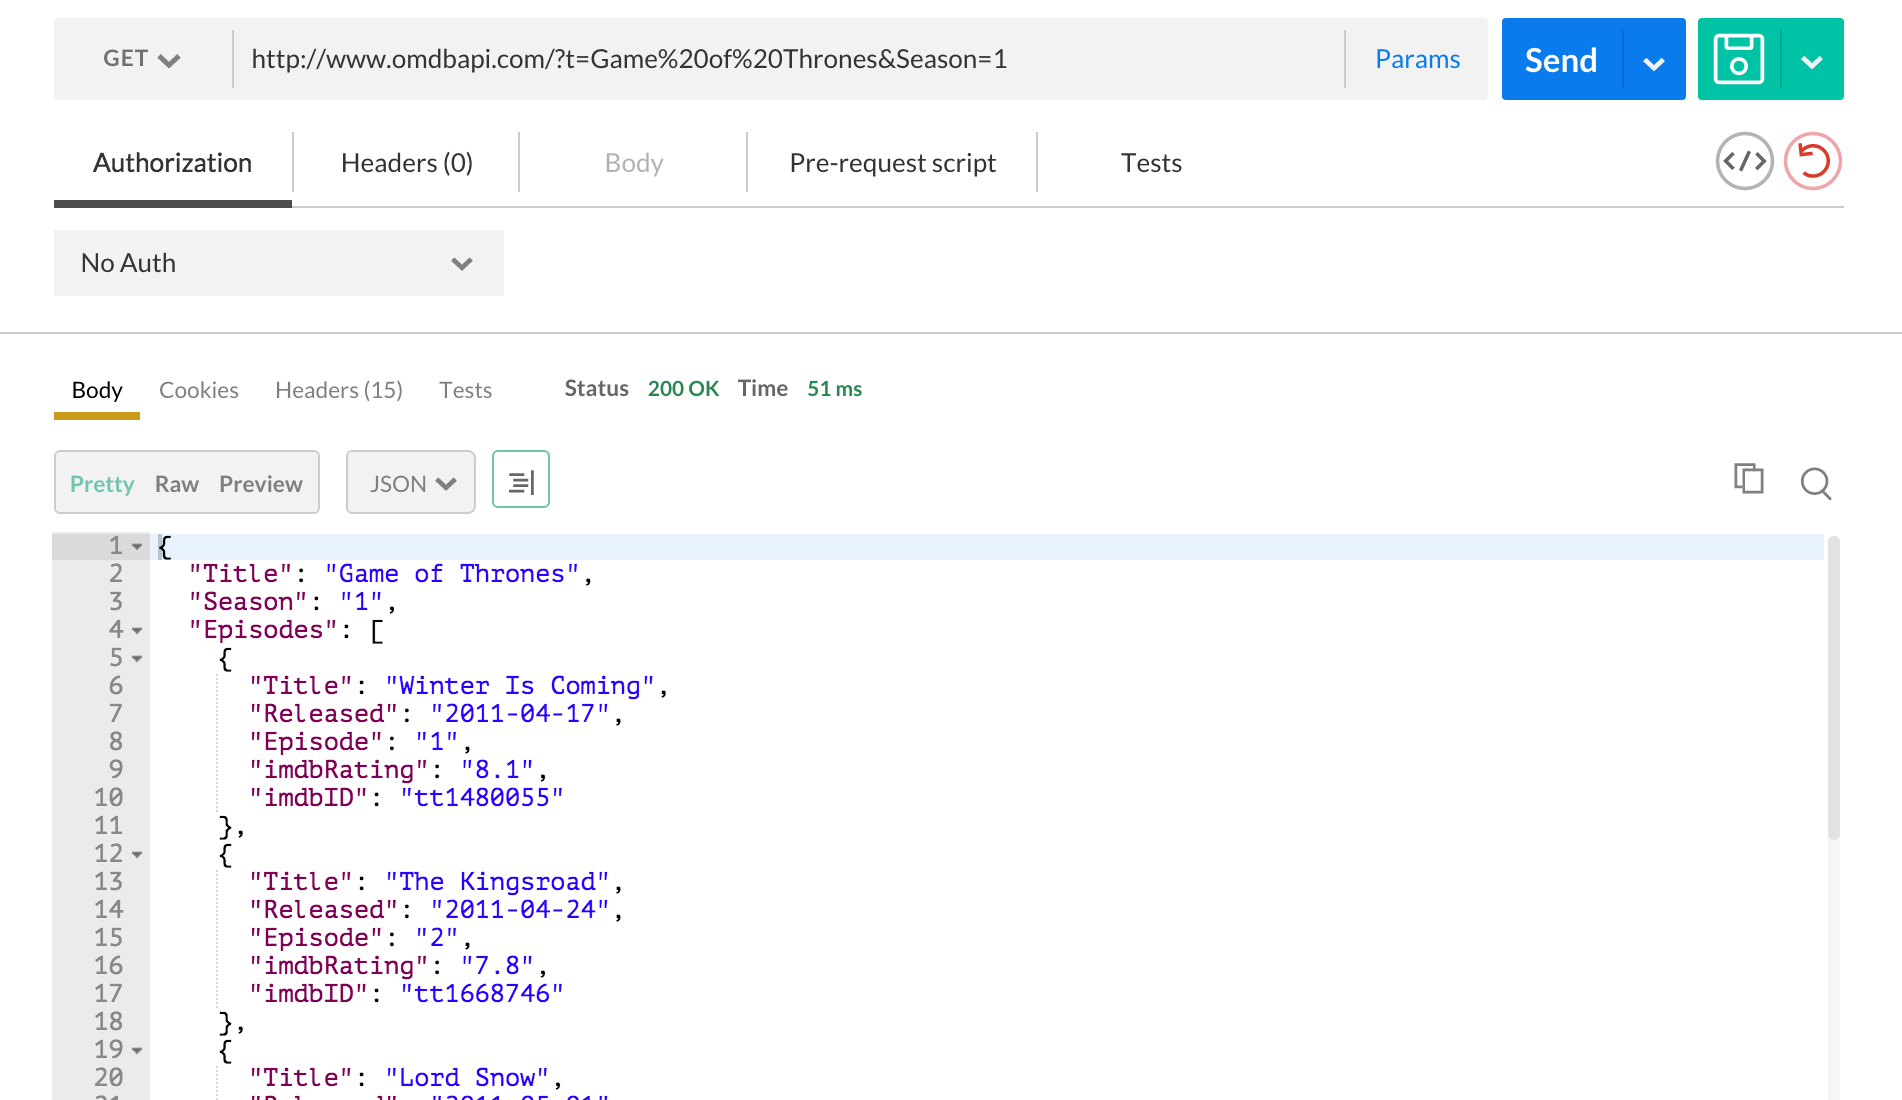
After poking around with that, we dive into the meat of the lesson, building a Rails API to serve JSON.
def show
  @post = Post.find(params[:id])

  respond_to do |format|
    format.html { render :show }
    format.json { render json: @post }
  end
end
We spend the rest of the morning rendering json and feeling super proud of our custom API. Lunch time.
FireBase/AngularFire: 2.5 Hours:
Up until this point, we’ve used Postgres and SQL to persist data. Today we explored an alternative: Firebase.
What Is Firebase?
Firebase is a PaaS, or “Platform as a Service.” That means it offers a number of cloud-based computing services, including the one that matters to us today: a realtime database. Not only can we access a Firebase DB programmatically using code, but we can also interact with data via a graphical interface in the browser.
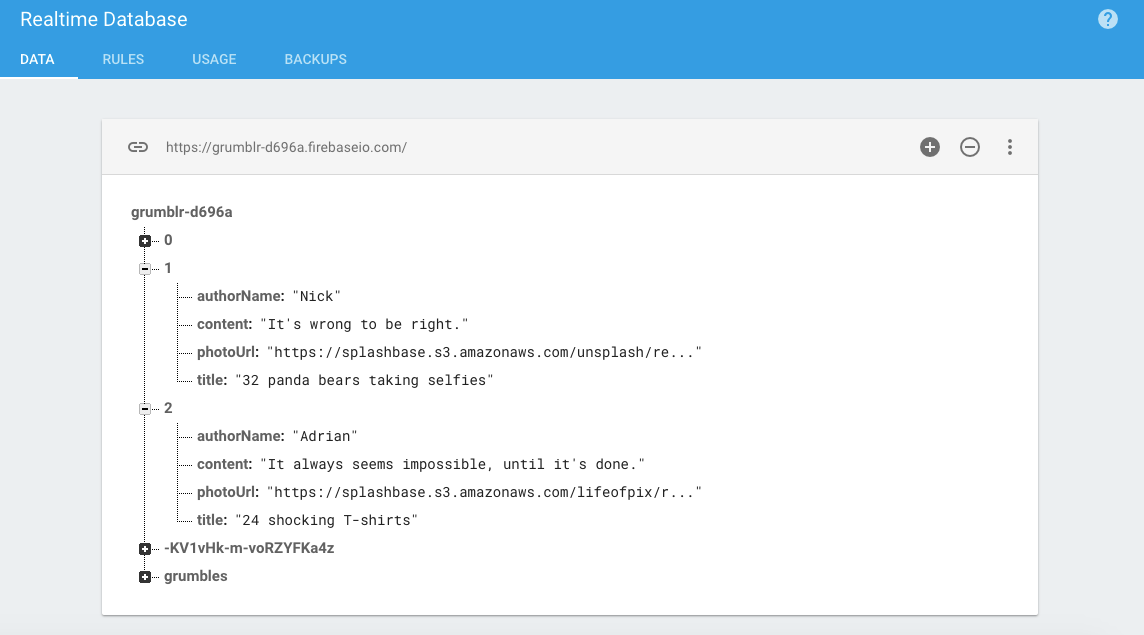
Unlike Postgres, Firebase is a NoSQL database. This means that information is not stored in tables and it does not make use of associations like has_many or belongs_to. Instead, information in a NoSQL database is stored in one big JSON tree.
Here’s a screenshot of my database in Firebase:
One way to connect an Angular application to a Firebase DB is AngularFire.
We spent the rest of class building the classic, TODO app, using Firebase DB to persist data.
No new homework tonight but homework is due tomorrow at 9am so I stayed at school to complete my assignments.
Day 4: Lab!!!
Homework is all turned in and now it’s time for a lab day.
Oh, lab day. You always come at the right time. Feeling overwhelmed, lab day is such a blessing. It’s time to sit down, break some code, and bring the week all together.
Today’s lab is pretty cool, too. We’re building a WDI Radio. This radio has Artist data, as well as their Songs, it should serve JSON and hosted with Firebase DB.
This was a fun lab that really helped me understand the power of Firebase.
We ended out the day with submitting up to 5 names of students that we would want to be in a group with. Honestly, I didn’t really like this format of picking groups… It just feels so exclusive. But I submitted my suggestions and (im)patiently waited for group announcements on Friday.
Day 5: PROJECT 3 - Group Project!
After, what felt like the longest week ever, Friday is here and so is Project 3… our first and only group project!
Everyone in class has been very anxious to see who is in who’s group. And drumroll, please……………. I was put into an AWESOME group of two other rockstar classmates. Yeah! This is going to be great.
Whoaaa. That was a long week and a long read. Thanks for sticking with me until the end and make sure to check out next week to see how our group project turned out!
Until Then!